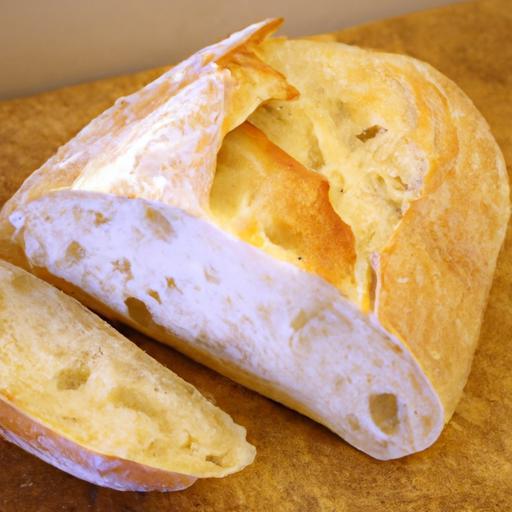
There’s something undeniably magical about a loaf of ciabatta bread-its crisp, golden crust giving way to a pillowy, soft interior that seems to melt in your mouth. Baking this Italian classic at home might sound like a daunting task, reserved for seasoned bakers or artisan bread shops, but the truth is simpler than you think. With a few straightforward steps, the right ingredients, and a little patience, you can transform your kitchen into a cozy bakery and create perfectly soft ciabatta bread that rivals any bakery’s finest. Let’s dive into the art of crafting this rustic delight, breaking it down into easy, manageable steps that will have you pulling fresh, fragrant ciabatta from your oven time and time again.
Simple steps to perfectly soft ciabatta bread at home start with choosing the finest ingredients that celebrate this Italian classic’s rustic charm. The iconic ciabatta’s open crumb and crisp crust demand a delicate balance of hydration and wheat quality, setting the stage for a loaf that is irresistibly pillowy inside yet satisfyingly crunchy outside. Drawing from tradition and my personal baking journey, the magic truly unfolds when passion meets precision-from flour selection to proofing mastery, each element is a brushstroke in your bread’s artful creation.
Prep and Cook Time
- Preparation: 20 minutes (plus 12-18 hours for sponge fermentation)
- Baking: 25 minutes
- Total Time: Approximately 14-18 hours (including fermentation)
Yield
Produces 2 medium-sized loaves, perfect for sharing or enjoying throughout the week.
Difficulty Level
Medium. Ideal for adventurous home bakers eager to explore fermentation and dough handling techniques.
Ingredients
- 500g bread flour, high-protein (preferably 13% gluten content)
- 350g water, lukewarm (around 75°F / 24°C)
- 100g biga or poolish (pre-ferment sponge prepared 12-18 hours prior)
- 2 tsp sea salt, fine ground
- 1 tsp active dry yeast
- 2 tbsp olive oil (extra virgin, for dough and brushing)
Instructions
- Activate the yeast: In a small bowl, dissolve yeast in lukewarm water. Let it bloom for 5-7 minutes until frothy, indicating active fermentation.
- Prepare the sponge: Combine 100g bread flour, 100g water, and a pinch of yeast in a medium bowl. Cover with plastic wrap and leave at room temperature for 12-18 hours until bubbly and aroma-rich. This step boosts flavor complexity and structure.
- Form the dough: In a large mixing bowl, add 400g bread flour and the sponge. Pour in the yeast water mixture and olive oil. Stir gently with a wooden spoon until just combined; the dough will feel sticky and wet-this hydration level is key for softness.
- Incorporate salt: Sprinkle salt over the dough and fold it in gently by hand or with a dough scraper, ensuring even distribution without deflating the air pockets.
- First fold: Transfer dough to a lightly oiled surface. Gently stretch and fold the dough over itself 3-4 times. This gentle handling strengthens gluten while preserving delicate bubbles.
- Bulk fermentation: Place the dough in a lightly oiled bowl, cover with a damp cloth or plastic wrap, and let it rise at room temperature for 2 hours until it has visibly expanded but not doubled.
- Stretch and fold sessions: Every 30 minutes during bulk fermentation, perform gentle folds (3 to 4 folds per session). This trains the gluten while maintaining hydration and dough structure.
- Shape and proof: Turn the dough onto a generously floured surface, divide into two portions without thoroughly degassing. Shape each into a flat, ovoid loaf. Transfer to parchment-lined baking sheets dusted with cornmeal. Cover loosely and let proof for 1-1.5 hours. The dough should puff visibly but retain a slight bounce to the touch.
- Preheat the oven: Set your oven to 230°C (450°F) with a baking stone or heavy sheet on the middle rack. Place a metal tray at the bottom for steam generation.
- Bake with steam: Just before sliding the dough onto the hot stone, pour a cup of hot water into the bottom tray to create steam. This environment will form the signature crispy crust. Bake for 20-25 minutes or until the crust is deep golden brown and the loaf sounds hollow when tapped.
- Cool properly: Remove bread from oven and transfer loaves to a wire rack. Allow chilling for at least 30 minutes; this step finalizes crumb texture and flavor development.
Tips for Success
- Flour quality: Opt for strong bread flour with higher protein to achieve that classic chewy and airy crumb.
- Hydration mastery: High hydration (around 70%) doughs are wetter and sticky but yield superb softness. Use wet hands or a bench scraper to handle dough gently without deflating.
- Proofing patience: Allow the dough time to ferment and proof fully; rushing compromises structure and moisture retention.
- Steam is essential: Don’t skip adding steam-it helps the crust expand before setting with a crisp finish.
- Make ahead: Prepare the sponge a day ahead for best flavor. You can also refrigerate the final shaped dough overnight for slower proofing and deeper taste.
Serving Suggestions
Slice freshly baked ciabatta to reveal its airy holes and serve warm with a drizzle of high-quality olive oil and a pinch of flaky sea salt. Pair it with ripe tomatoes, creamy burrata, or your favorite rustic Italian charcuterie for a simple yet elegant spread. Toast slices lightly and use as a vessel for hearty soups or vibrant bruschetta toppings. Fresh herbs like basil or rosemary not only enchant the aroma but brighten the presentation beautifully.

Nutritional Information
| Per Serving | Calories | Protein | Carbohydrates | Fat |
|---|---|---|---|---|
| 1 slice (approx. 60g) | 160 kcal | 5g | 30g | 2g |
Explore more artisan bread recipes and elevate your baking game with our bread baking tips article. For scientific insights on yeast fermentation and dough hydration, visit King Arthur Baking’s yeast guide.
Q&A
Q&A: Simple Steps to Perfectly Soft Ciabatta Bread at Home
Q1: What makes ciabatta bread different from other types of bread?
A1: Ciabatta is known for its rustic, slightly crispy crust and airy, open crumb. Unlike denser loaves, its light and chewy texture comes from a high-hydration dough and a gentle handling process. It’s an Italian classic that feels fancy but bakes up at home with approachable techniques!
Q2: Why is hydration important in making soft ciabatta?
A2: Hydration refers to the water-to-flour ratio in your dough. A higher hydration dough (think 70% or more water) creates steam inside the loaf as it bakes, giving that coveted soft, porous interior. It’s a little sticky and challenging to handle at first but worth every sticky fingertip!
Q3: Can I mix ciabatta dough by hand or do I need a mixer?
A3: Absolutely! Mixing by hand is traditional and perfectly fine. The trick is gentle folding and stretching rather than vigorous kneading – this preserves the dough’s air bubbles and elasticity. For beginners, a stand mixer with a dough hook can make it easier, but your hands have the magic touch.
Q4: How long should I let the dough rise to get that perfect fluffiness?
A4: Patience is your best ingredient here! A slow, cold rise in the fridge for 12-24 hours develops flavor and texture. If in a hurry, a warm spot for 1-2 hours until doubled works, but the slow ferment will give you that silky softness.
Q5: What’s the secret to getting a crisp crust while keeping the inside soft?
A5: Steam is the key! Bake your ciabatta in a hot oven with a pan of water or spray water into the oven to create steam at the start. This keeps the crust from hardening too early and lets your bread rise fully before forming that golden, crackly shell.
Q6: Do I need special flour for ciabatta?
A6: You don’t need anything fancy, but bread flour with higher protein content helps develop good gluten structure for that chewy bite. All-purpose flour works well too, especially if mixed with a bit of whole wheat for flavor depth.
Q7: Can I freeze ciabatta dough or the finished bread?
A7: Yes, either works! Freeze dough after the first rise, wrapped tightly, then thaw and shape before the second rise. Or bake it, cool completely, and freeze slices for quick toast-and-go bites. Just remember to let frozen bread thaw fully before enjoying for the best softness.
Q8: Any tips for shaping ciabatta without deflating it?
A8: Think gentle and light-handle the dough with floured hands, use a bench scraper to transfer and stretch it carefully. Avoid punching it down; folding the dough onto itself keeps those airy pockets intact. The looser the dough feels, the better-the shape will still hold during baking.
Q9: How can I add flavors without losing softness?
A9: You can incorporate herbs, olives, garlic, or even sun-dried tomatoes during the folding stage. Just be cautious not to overload the dough as heavy add-ins can weigh it down. Lightly diced or chopped ingredients spread evenly work best to maintain that perfect crumb.
Q10: What’s the best way to store ciabatta bread?
A10: For maximum softness, store ciabatta in a paper bag at room temperature. Plastic bags trap moisture and can make crust soggy but keep the crumb soft for a day or two. For longer storage, freeze tightly wrapped slices or whole loaf after cooling.
With these simple yet trusty steps, your home kitchen will soon be filling with the irresistible aroma of freshly baked, perfectly soft ciabatta-ready to slather with olive oil, pile high with your favorite sandwich fixings, or enjoy straight from the crusty slice!
Final Thoughts
Baking the perfect ciabatta at home doesn’t have to be a daunting quest reserved for seasoned bakers. With these simple steps, you’ve unlocked the secrets to creating a loaf that’s beautifully soft, delightfully airy, and bursting with flavor-right from your own kitchen. So grab your flour, embrace the dough’s gentle rise, and let each bite of your homemade ciabatta be a delicious reminder that sometimes, the simplest techniques yield the most extraordinary results. Happy baking!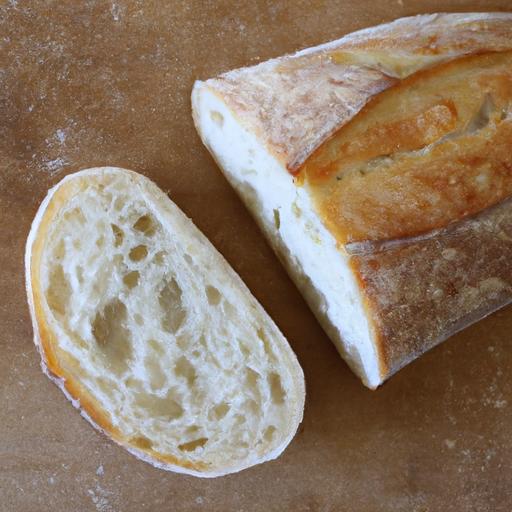


