There’s something undeniably magical about the transformation of simple ingredients into creamy, luscious yogurt-a ritual that’s as old as time yet bursting with modern-day charm. Welcome to the world of whisking wonders, where the humble kitchen becomes your personal dairy lab, and patience is the key ingredient to pure delight. Crafting creamy yogurt at home isn’t just a culinary project; it’s an art form that blends science, tradition, and a touch of creativity. In this article, we’ll whisk you through the easy steps to turn milk into velvety yogurt, uncover the secrets behind achieving that perfect silky texture, and inspire you to savor every spoonful of your homemade masterpiece. Ready to embark on this deliciously rewarding adventure? Let’s dive in.
- Prep and Cook Time
- Yield
- Difficulty Level
- Ingredients
- The Science Behind Silky Smooth Yogurt: Understanding Fermentation and Texture
- Step by Step Guide to Mastering the Ideal Yogurt Consistency
- Innovative Tips and Flavor Boosters to Elevate Your Homemade Yogurt Experience
- Chef’s Notes
- Serving Suggestions
- Q&A
- Insights and Conclusions
Whisking Wonders: Crafting Creamy Yogurt at Home Easily
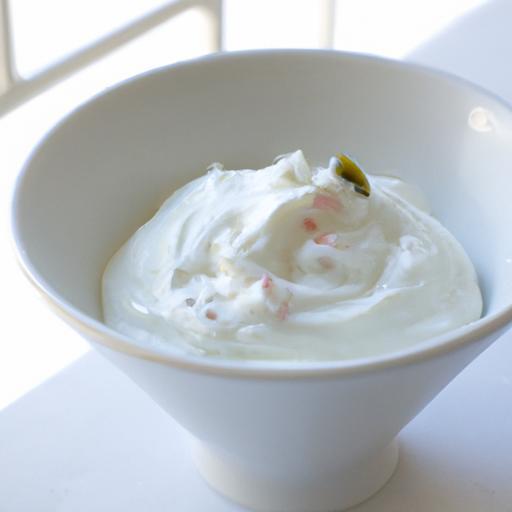
Whisking wonders come alive when you embark on the journey of crafting creamy yogurt at home easily. This age-old dairy delight, lovingly fermented over time, holds a magic that transforms simple milk into a silky smooth treasure overflowing with probiotics and rich texture. From the cozy villages of India and Greece to modern kitchens worldwide, homemade yogurt connects us deeply to tradition and self-care. With the right approach, you can relish luscious, fresh yogurt with a velvety finish that supermarket tubs can’t quite match.
Prep and Cook Time
- Preparation Time: 10 minutes
- Fermentation Time: 8-12 hours (varies with temperature)
- Total Time: Approximately 12 hours
Yield
About 4 cups (1 quart) of creamy homemade yogurt
Difficulty Level
Easy – Perfect for beginners and yogurt enthusiasts alike
Ingredients
- 4 cups whole milk (preferably fresh, full-fat for creaminess)
- 2 tablespoons plain yogurt with live active cultures (starter)
- Optional: 1-2 tablespoons powdered milk (to enhance thickness)
- Optional: Sweeteners or flavor enhancers like honey, vanilla extract, or fruit puree
The Science Behind Silky Smooth Yogurt: Understanding Fermentation and Texture
The secret to brushing homemade yogurt with silky charm lies in fermentation – the magical process where friendly bacteria metabolize milk sugars into lactic acid. This acid gently curdles milk proteins, creating a creamy network that defines yogurt’s texture. The smoothness emerges when proteins denature just enough, without becoming grainy or watery. Using whole milk and a touch of powdered milk can boost creaminess by increasing solids, while maintaining stable fermentation temperatures around 110°F encourages a consistent, thick set.
Step by Step Guide to Mastering the Ideal Yogurt Consistency
- Warm the milk: Pour 4 cups of milk into a heavy-bottomed saucepan. Heat over medium flame until just below boiling-about 180°F-stirring gently to avoid scorching.
- Cool the milk: Remove the saucepan and let it cool to about 110°F. This is the sweet spot for bacteria activation.
- Prepare the starter: In a small bowl, whisk the 2 tablespoons of plain yogurt until smooth. Add a few tablespoons of warm milk to temper the yogurt, then mix back into the pot.
- Optional thickening: Stir in 1-2 tablespoons of powdered milk to amplify yogurt’s body without altering taste.
- Incubate: Pour the mixture into a clean container or jar, cover it, and keep warm (ideally around 110°F) for 8-12 hours. An oven set to its lowest setting, a yogurt maker, or a thermos works well.
- Check for set: The yogurt should be thick with a slight tang and glossy surface. Refrigerate for 4+ hours to complete the setting and chill fully.
- Whisk and serve: Stir gently to achieve your preferred consistency-silky and smooth or spoon-stiff.
Innovative Tips and Flavor Boosters to Elevate Your Homemade Yogurt Experience
- For extra silkiness, strain your yogurt through cheesecloth for Greek-style thickness.
- Enhance probiotics by using high-quality live active cultures found in natural plain yogurt or freeze-dried starters.
- Experiment with natural sweeteners like honey, maple syrup, or date syrup swirled gently after incubation.
- Introduce fresh fruit purees, cinnamon, vanilla bean, or cardamom during the incubation stage for subtle infusions.
- Utilize glass or ceramic bowls for incubation for temperature stability and hygiene.
- To prevent whey separation, avoid stirring yogurt immediately after incubation; let it cool first, then gently whisk.
Chef’s Notes
Milk choice: Whole milk yields the most luscious texture, but 2% works fine for lighter versions. Avoid ultra-pasteurized milks as they may resist setting properly.
Starter quality: Use a fresh, live yogurt starter. If using your own homemade batch, refresh the culture every 4-5 cycles to prevent thinning.
Temperature control: Consistency hinges on maintaining stable incubation heat. Invest in a yogurt maker or use an insulated container for best results.
Make-ahead tip: Yogurt tastes fantastic on day two and can be refrigerated safely for up to 2 weeks.
Serving Suggestions
Nothing beats homemade yogurt drizzled with golden honey, crowned with a sprinkle of crunchy granola and a handful of fresh berries. For savory touches, add a pinch of flaky sea salt, chopped herbs like mint or dill, and a drizzle of olive oil. Use it as a creamy base for smoothies, salad dressings, or luscious dips accompanied by roasted veggies and warm breads.

| Nutrient | Per 1 cup (245g) |
|---|---|
| Calories | 150 |
| Protein | 8g |
| Carbohydrates | 12g |
| Fat | 8g |
Interested in exploring more dairy delights? Check out our guide on crafting homemade cheese for more kitchen adventures.
Q&A
Q&A: Whisking Wonders – Crafting Creamy Yogurt at Home Easily
Q1: Why make yogurt at home instead of buying it?
A1: Making yogurt at home is like unlocking a creamy treasure chest-freshness, flavor control, and wholesome goodness all wrapped in one jar. Plus, it’s free from preservatives and additives, letting you enjoy pure, natural yogurt tailored to your taste buds!
Q2: What’s the secret behind that velvety creaminess?
A2: The magic begins with the perfect balance of warmth and time. Gently whisking the milk and starter culture helps distribute the friendly bacteria evenly, while slow fermentation transforms it into a luscious, silky delight. Patience and a steady hand turn simple milk into creamy perfection!
Q3: Can I use any milk to make yogurt?
A3: Almost any milk can join the creamy dance-cow, goat, sheep, or even plant-based varieties like coconut or almond milk (though these need a few tweaks!). Whole milk usually yields the richest, creamiest texture, but feel free to experiment and find your favorite.
Q4: How important is the starter culture?
A4: The starter is your yogurt’s soul. It’s packed with live bacteria that kick-start fermentation. Using a good-quality store-bought yogurt with live cultures or a powdered yogurt starter ensures your homemade batch will bloom with tangy goodness.
Q5: What’s the easiest way to whisk for perfect yogurt?
A5: Whisk like a gentle artist! Aim for smooth, consistent strokes that blend milk and starter flawlessly without creating bubbles. You can use a handheld whisk or even a fork-just keep it steady and rhythmic to coax out creamy magic.
Q6: How long should homemade yogurt ferment?
A6: Time is your creamy ally! Generally, 6 to 12 hours of fermentation at a cozy 110°F (43°C) lets friendly bacteria work their charm. Longer fermentation deepens tanginess, so taste as you go to capture your ideal zing.
Q7: Can I flavor my yogurt during or after making it?
A7: Absolutely! For a natural swirl of flavors, add honey, vanilla, or fruit puree after fermentation-this keeps your yogurt silky smooth. If you want infused flavors, like herbs or spices, add them during the initial mixing, but keep it light to maintain creaminess.
Q8: How can I store homemade yogurt?
A8: Treat your homemade masterpiece like royalty-store it in a clean, airtight container in the fridge. It usually stays fresh for up to 2 weeks, but the sooner you enjoy it, the creamier and brighter the flavor.
Q9: Is homemade yogurt healthy?
A9: Definitely! Homemade yogurt is a probiotic powerhouse, promoting gut health and boosting immunity. Plus, you control the ingredients-no hidden sugars, preservatives, or artificial flavors-just pure, creamy nutrition.
Q10: Any tips for beginners stepping into the world of homemade yogurt?
A10: Embrace the adventure! Start simple, use fresh ingredients, maintain steady warmth, and don’t rush the process. Each batch is a new canvas-experiment, adjust, and enjoy the whisking wonders as you master your creamy craft.
Insights and Conclusions
As you embark on your homemade yogurt journey, remember that the magic lies not only in the ingredients but in your patience and care. Whisking wonders at home transforms simple milk and cultures into a creamy canvas of flavor and nourishment. With every silky spoonful you craft, you’re not just making yogurt-you’re mastering a timeless tradition that comforts, delights, and fuels your body naturally. So, roll up your sleeves, embrace the art of fermentation, and savor the creamy bliss of homemade yogurt, made easy and uniquely yours.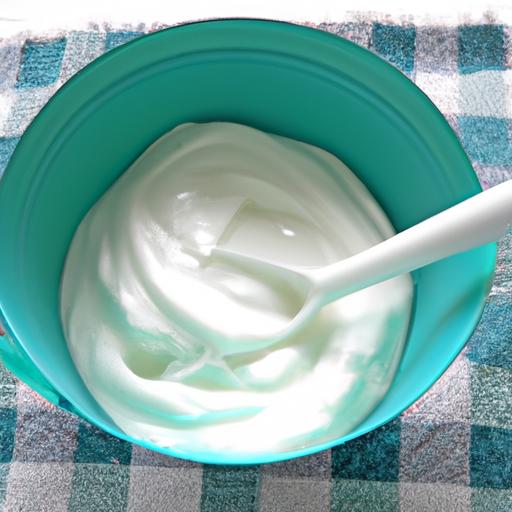


