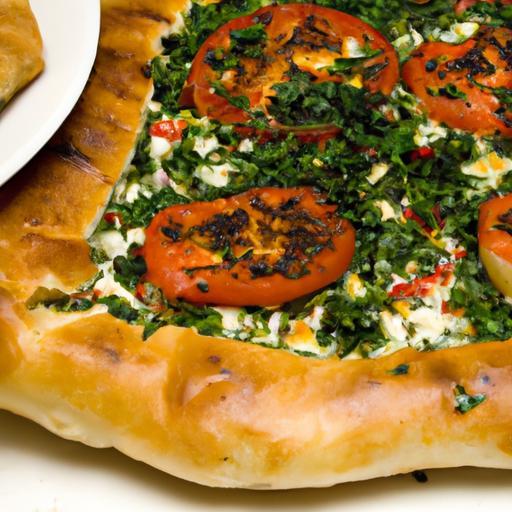
There’s a certain magic in the sizzling aroma of freshly baked pide – that golden, boat-shaped Turkish delight that bridges crispy, chewy, and savory in every bite. Whether you’ve savored it in a bustling Istanbul marketplace or at a cozy neighborhood eatery, the allure of mastering this beloved bread at home is irresistible. In this article, we’ll embark on a culinary journey, unpacking the secrets behind making perfect pide from scratch. From mixing the dough to layering sumptuous toppings and achieving that enviable crust, get ready to transform your kitchen into a pide artisan’s workshop. Let’s dive into the heart of this time-honored tradition and bring the taste of Turkey right to your table.
Mastering the Art of Perfect Pide at Home begins with a deep appreciation for its origins and craftsmanship. This beloved Turkish flatbread, shaped like a boat and topped with a variety of savory fillings, is a celebration of balanced flavors and rustic baking techniques.
Each bite delivers a medley of textures-the soft, airy crumb of the dough paired with rich toppings that meld harmoniously under the gentle heat of the oven. Whether you’re a seasoned baker or a curious foodie, learning the nuances behind dough preparation, topping harmony, and bake timing will empower you to create authentic pide that impresses every time.
Prep and Cook Time
- Preparation: 20 minutes (plus 1 hour rising time)
- Cooking: 15-18 minutes
- Total Time: Approximately 1 hour 35 minutes
Yield
- Makes 4 medium-sized pide (serves 4)
Difficulty Level
- Medium – Ideal for home cooks comfortable with dough handling
Ingredients
- For the Dough:
- 3 cups all-purpose flour, sifted
- 1 teaspoon active dry yeast
- 1 teaspoon sugar
- 1 teaspoon salt
- 1 cup warm water (about 110°F / 43°C)
- 2 tablespoons olive oil
- For the Classic Toppings:
- 200g ground lamb or beef
- 1 small onion, finely diced
- 1/2 cup diced tomatoes, drained
- 1/4 cup chopped parsley
- 1 teaspoon paprika
- Salt and freshly ground black pepper, to taste
- 100g crumbled feta cheese
- 1 egg (for egg wash or topping)
Instructions
- Activate the Yeast: In a small bowl, combine warm water, sugar, and yeast. Stir gently and let it sit for 5-7 minutes until foamy, signaling active yeast.
- Mix the Dough: In a large mixing bowl, combine sifted flour and salt. Gradually add the yeast mixture and olive oil, stirring with a wooden spoon until a shaggy dough forms.
- Knead the Dough: Transfer to a floured surface and knead vigorously for 8-10 minutes until smooth and elastic. Add a little flour if sticky, but keep the dough soft and pliable.
- First Rise: Place the dough in a lightly oiled bowl, cover with a clean kitchen towel, and let it rise in a warm spot for about 1 hour or until doubled in size.
- Prepare the Topping: While the dough rises, heat a small skillet over medium heat. Add ground meat and diced onion; sauté until browned and aromatic, about 7 minutes. Stir in diced tomatoes, paprika, salt, and pepper. Remove from heat and mix in parsley. Allow to cool.
- Shape the Dough: Punch down the risen dough and divide into 4 equal parts. Roll each into an oval shape about 10 inches long and 5 inches wide. Transfer to a parchment-lined baking sheet.
- Assemble the Pide: Spoon the meat mixture evenly onto each oval, leaving a 1-inch border. Sprinkle crumbled feta evenly over the top. Fold the edges inward, pinching the ends to form the traditional boat shape.
- Egg Wash and Optional Egg: Beat the egg and brush the edges of the dough with it for a glossy golden crust. If you like, crack an egg gently in the center of each pide before baking for a rich, runny yolk finish.
- Bake: Preheat your oven to 450°F (232°C) and bake the pide on the center rack for 15-18 minutes until the crust is puffed, golden, and crisp.
- Finish and Serve: Remove from oven and let sit 2 minutes before slicing. Garnish with extra parsley or a sprinkle of chili flakes if desired, then serve warm.
Tips for Success
- Dough Consistency: The key to perfect pide dough is a soft but non-sticky texture. Use warm water carefully and knead thoroughly for airy crumb.
- Toppings Balance: Layer toppings thoughtfully-too wet or too much moisture-heavy ingredients can make the dough soggy. Drain tomatoes well and cook filling before baking.
- Oven Setup: For an ideal bake, place a pizza stone or inverted baking sheet in the oven beforehand to retain intense, even heat.
- Make Ahead: Dough can be refrigerated for up to 24 hours after the first rise; bring back to room temperature before shaping.
- Substitutions: Try spinach and feta, or spiced cheese blends for vegetarian toppings. Swap meats with ground chicken or lamb for flavor variation.
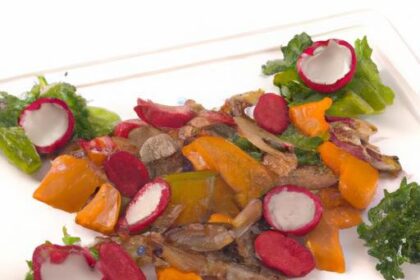
Serving Suggestions
Enjoy your freshly baked pide with a side of creamy yogurt garlic sauce or a tangy sumac salad for authentic Turkish flair. Pair with a light red wine or herbal tea for a complete experience. Garnish with fresh parsley or a sprinkle of Aleppo pepper to add vibrant color and zing.

| Nutrient | Per Serving (1 pide) |
|---|---|
| Calories | 420 kcal |
| Protein | 22g |
| Carbohydrates | 45g |
| Fat | 15g |
For more about dough techniques and regional Turkish bread variations, explore our guide on homemade Turkish breads. To deepen your knowledge of yeast science and baking tips, King Arthur Baking’s yeast guide is an excellent resource.
Q&A
Q&A: Mastering the Art: How to Make Perfect Pide at Home
Q1: What exactly is pide, and why should I try making it at home?
A1: Pide is often called the Turkish cousin of pizza-a delightful, boat-shaped flatbread topped with a variety of savory ingredients like cheese, meats, and veggies. Making it at home brings an immersive experience, letting you customize flavors, experiment with dough textures, and share a warm, freshly-baked masterpiece straight from your own oven. Plus, nothing beats the pride of slicing into your homemade pide!
Q2: What are the key ingredients for the perfect pide dough?
A2: The magic starts with a simple dough blend: high-quality all-purpose or bread flour, warm water, active dry yeast, a pinch of sugar to wake the yeast up, salt for flavor, and a touch of olive oil for elasticity and richness. The secret lies in patience-the dough needs gentle kneading and a leisurely rise to develop its soft yet slightly chewy texture.
Q3: Can I customize the toppings, or are there traditional choices I should try first?
A3: Absolutely personalize your pide toppings! Traditional options often feature ground lamb or beef, feta or kasseri cheese, tomatoes, onions, and fresh herbs like parsley. For an adventurous twist, try incorporating spicy sucuk sausage, mushrooms, or even a cracked egg nestled in the center. The beauty of pide is its versatility-it’s a canvas for your culinary creativity.
Q4: How can I shape my dough to achieve that iconic boat shape?
A4: After rolling your dough into an oval or elongated ellipse, gently pinch and fold the edges up all around, leaving the center open for toppings. Think of it as cradling a flavorful riverbed. This shape not only looks striking but helps hold the toppings and juices in place during baking.
Q5: Any tips for baking pide like a pro without a traditional stone oven?
A5: Of course! Preheat your oven to a high temperature-typically around 475°F (245°C)-and place a baking stone or inverted baking sheet inside to mimic a hot stone floor. Slide your assembled pide on this hot surface to bake; the intense heat crisps the base while keeping the toppings perfectly cooked. Don’t forget to brush the crust edges with melted butter or egg wash for a golden finish.
Q6: How do I know when my pide is perfectly baked?
A6: You’ll want a crust that’s crisp yet tender-a beautiful golden brown with slight puffing along the edges. The cheese should be melted and bubbly, toppings tender but not dried out. A quick tap on the crust should feel firm but not rock-hard. When you see these signs, your pide is ready to be savored!
Q7: What sides or accompaniments pair best with homemade pide?
A7: Serve your pide alongside fresh, tangy accompaniments to balance richness-think a crisp green salad with lemon dressing, a dollop of creamy yogurt, or a simple tomato and cucumber salad dressed in olive oil and herbs. A glass of Turkish tea or a light, fruity red wine also complements the meal splendidly.
Q8: Any final words of wisdom for pide rookies venturing into this delicious craft?
A8: Don’t rush the process-embrace the kneading, the rise, the art of topping. Each step connects you to centuries of culinary tradition. Mistakes are part of the journey; uneven shapes or bubbling cheese add character to your creation. Most importantly, have fun and share your pide stories-after all, food is best enjoyed in great company!
Wrapping Up
As you close the oven door on your freshly baked pide, you’re not just crafting a dish-you’re embracing a centuries-old tradition and adding your own chapter to its story. Mastering the art of making perfect pide at home is more than following a recipe; it’s about understanding the dance of dough and filling, the harmony of flavors, and the joy of sharing a warm, golden creation with loved ones. So take what you’ve learned here, infuse it with your own creativity, and let each pide you bake be a delicious testament to your kitchen confidence and culinary passion. Happy baking, and may every slice bring you one step closer to pide perfection!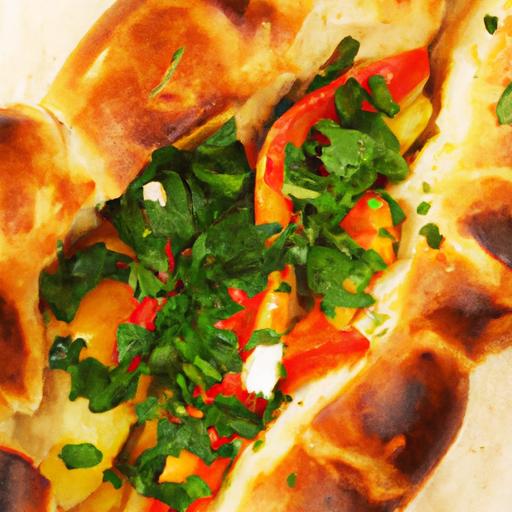


